1. QEMU-仿真模拟 STM32F103 开发板
https://www.cnblogs.com/asmer/p/16813129.html
QEMU 是一款开源虚拟机, 可以用来模拟各种系统开发板, 当然也可以用来模拟 stm32 的开发板
QEMU 官方说明文档在此 https://www.qemu.org/docs/master/system/arm/stm32.html
不过我们使用的并不是官方的版本, 而是别人魔改的一个版本, 用 QEMU 模拟 STM32 这事很多人干过,
1.1. 安装
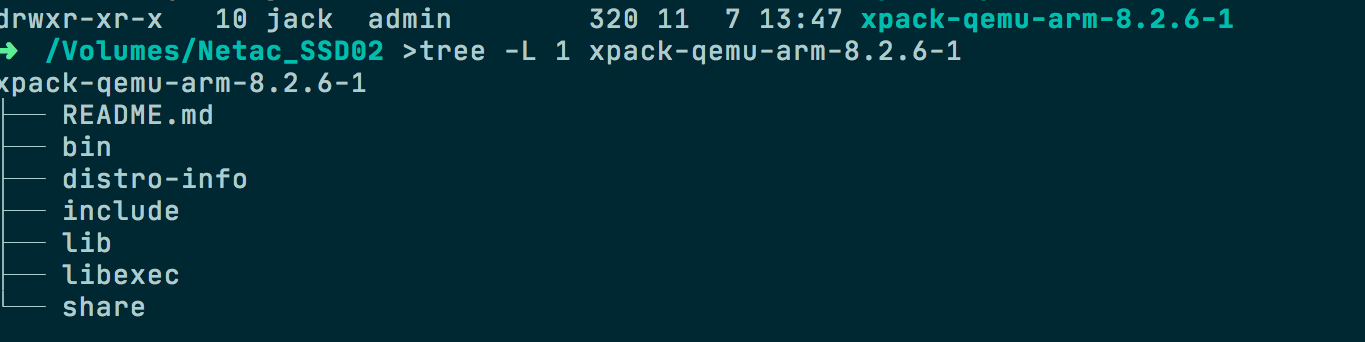
代码地址:
https://xpack.github.io/qemu-arm/
下载地址:
https://github.com/xpack-dev-tools/qemu-arm-xpack/releases/tag/v8.2.6-1
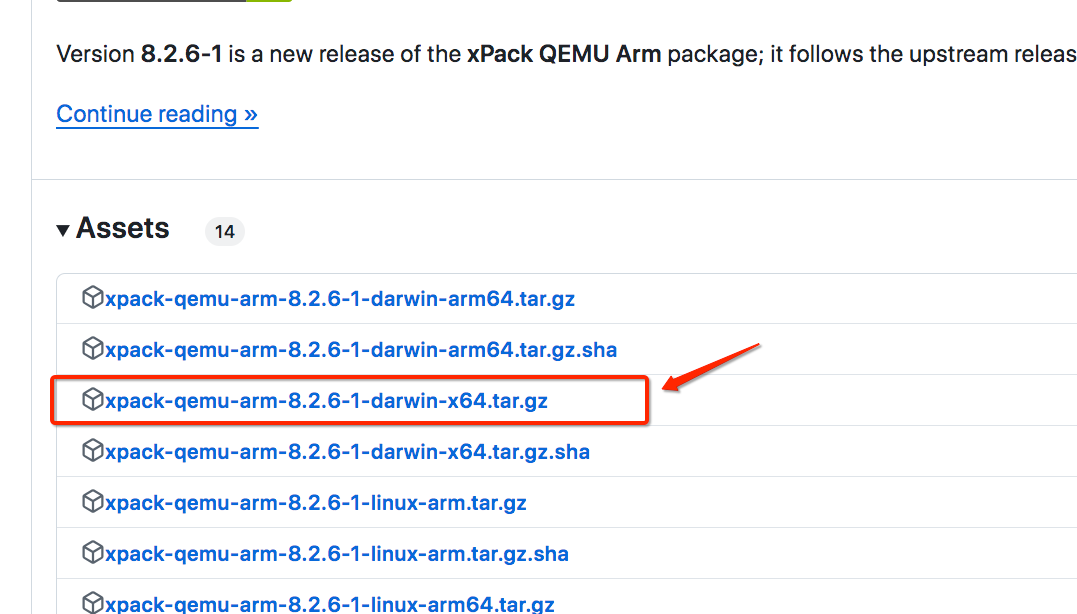


因为兼容性问题, 后期可能还会再维护一段时间, 如果下载的文件没有这个版本, 大概率说明这个版本已经撤销了, 文章关了, 可以退出了…
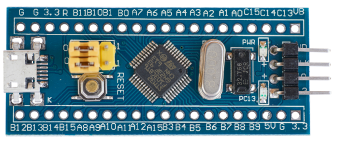
这里模拟的开发板是 STM32-Bluepill(STM32F103), 也就是淘宝拼多多上销量最高的那款, 似乎都有些修改, 不过都是大同小异.
1.2. 使用方式
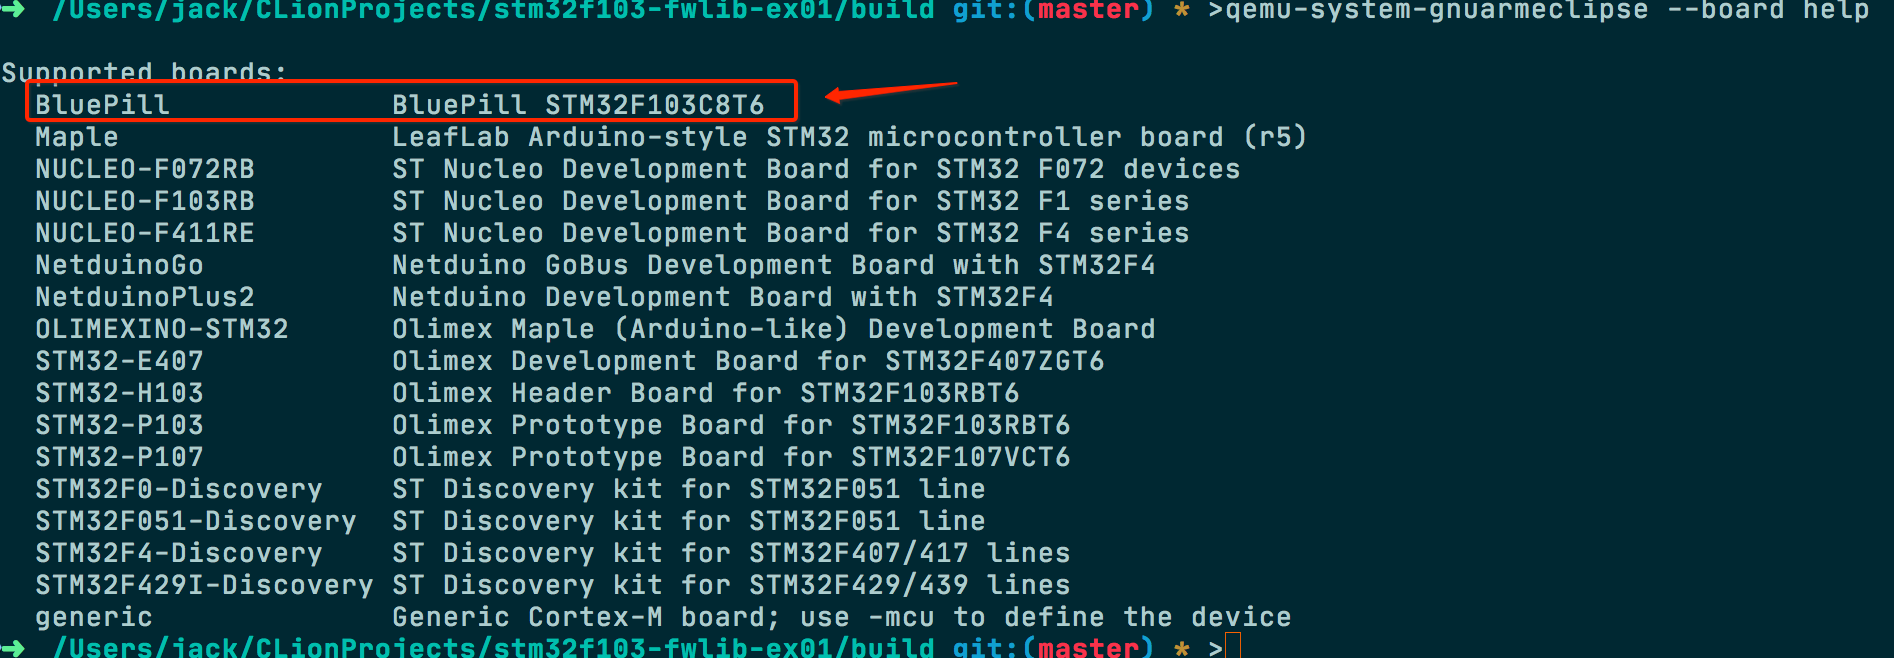
到 qemu-system-gnuarmeclipse 所在的文件夹, 打开命令行或者
1 | qemu-system-gnuarmeclipse --board BluePill --image 你的stm32程序文件路径.elf |
主要用到两个参数, --board 是设置开发板类型, --image 是设置 elf 程序文件. 需要注意这两个命令 官方的 QEMU 都是不支持的.
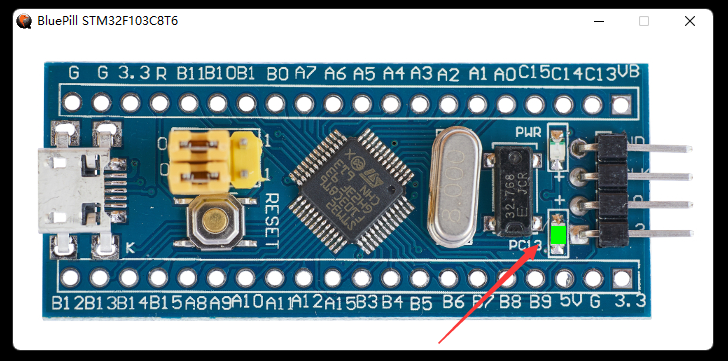
我这里烧录的程序是控制 PC13 亮灭的, BluePill 开发板 PC13 连的是一个 led 灯. 代码是用 arm-none-eabi-gcc 编译的.
工程代码:
1 |
|
执行效果如图所示:
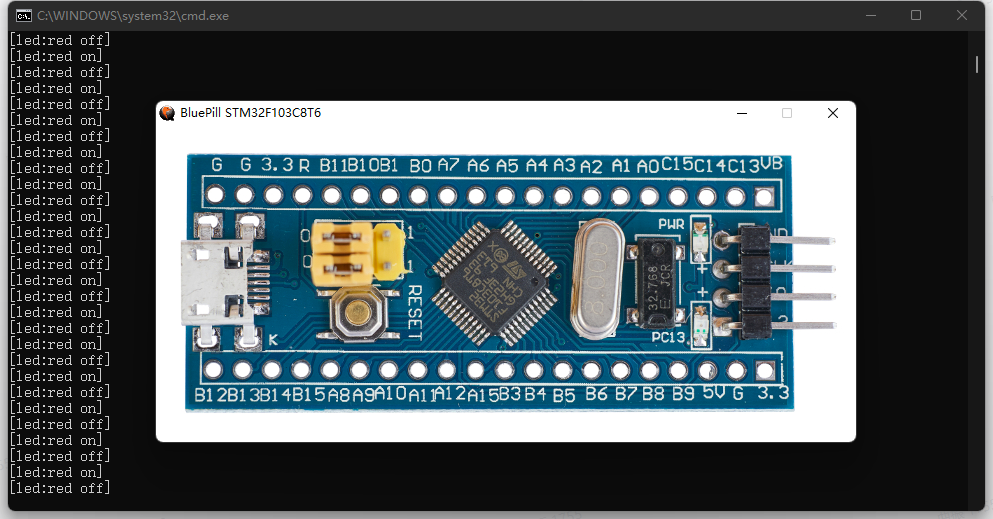
软件还做了点动画效果, 这个灯确实能一闪一闪的
1.3. GDB 调试
如果需要使用 GDB 调试的话需要添加两个参数 -S -s
1 | qemu-system-gnuarmeclipse -S -s --board BluePill --image 你的stm32程序文件路径.elf |
之后启动 GDB 连接 1234 这个端口, 然后设置文件.
1 | tar remote localhost:1234 |
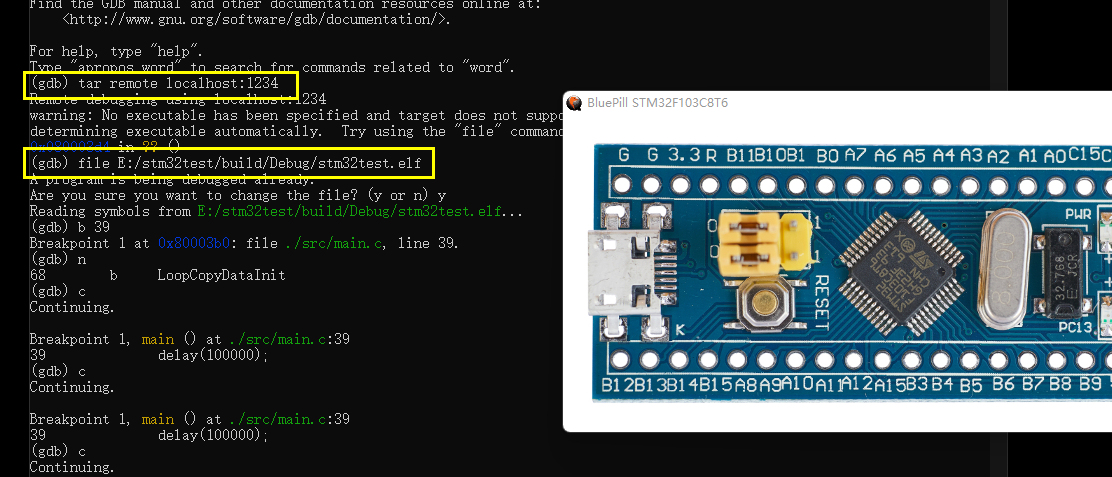
之后就可以愉快的进行调试了.
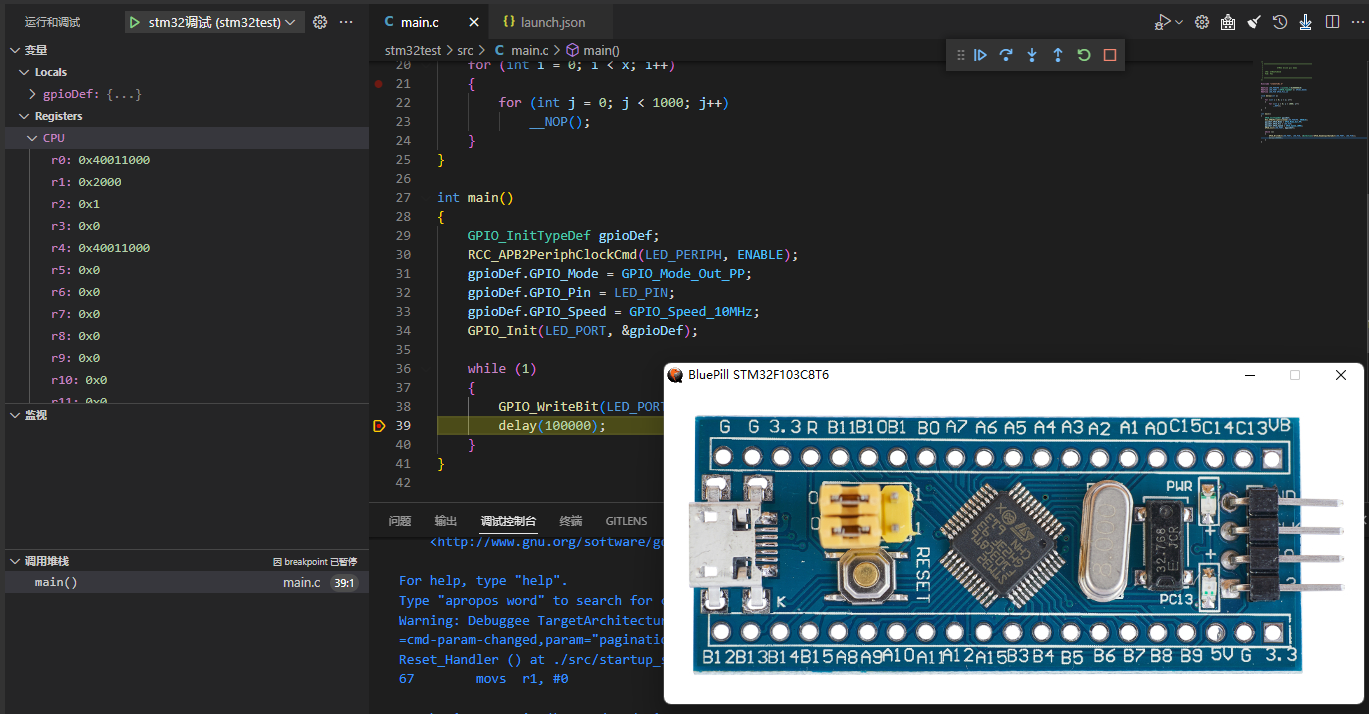
1.4. 使用 VScode 调试
GDB 命令行使用不方便的话也可以用 VScode 的机制进行调试, 实际上也是使用的 GDB, 只不过是有了图形界面会方便点.
添加 json 调试配置文件.
1 | { |
2. 下载stm32-p103这个板子的各种demo程序
去github下载stm32-p103这个板子的各种demo程序,https://github.com/beckus/stm32_p103_demos (对了顺便说一下,这个的qume的串口输出不到控制台,原作者自己也说了不知道为什么,而且多个博客也看到有人说printf无效的。想输出到控制台,可以看我别的qemu文章,你一定会有收获的)
3. STM32 Blue Pill — Unit Testing with Qemu Blue Pill Emulator
STM32 Blue Pill — Unit Testing with Qemu Blue Pill Emulator
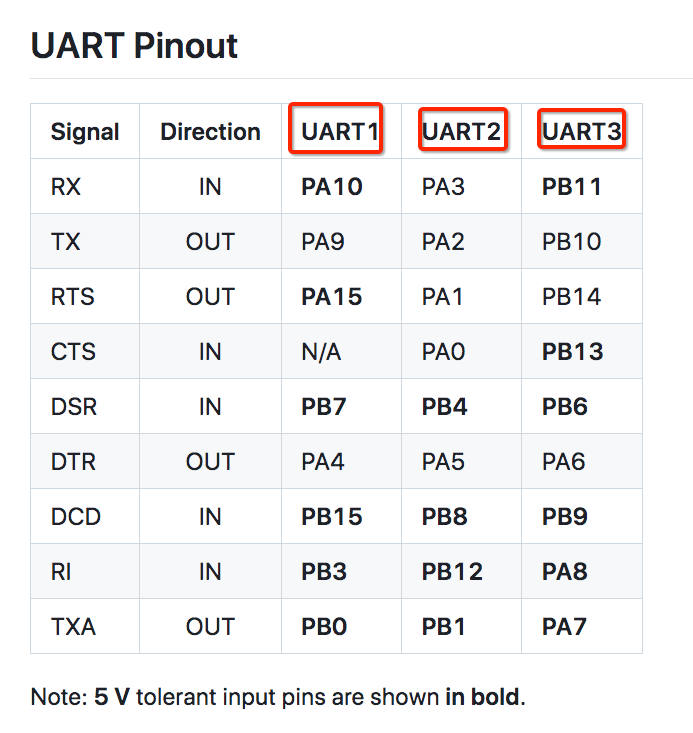
4. STM32 Blue Pill三路USB转串口适配器固件指南
旨在为STM32F103C8T6“蓝药片”最小开发板提供一个三合一的USB转串口适配器固件。
bluepill-serial-monster is a firmware for STM32 Blue Pill that turns it into a 3 Port USB-to-Serial adapter. The firmware implements a USB 2.0 full-speed composite device that consists of 3 USB CDC devices.
4.1. Features
- 3 independent UART ports;
- Hardware flow control (RTS/CTS) support1;
- DSR/DTR/DCD/RI signals support;
- 7 or 8 bit word length;
- None, even, odd parity;
- 1, 1.5, and 2 stop bits;
- Works with CDC Class drives on Linux, macOS, and Windows;
- Supports all baud rates up to 2 MBaud;
- TXA signal for controlling RS-485 transceivers (DE, /RE);
- DMA RX/TX for high-speed communications;
- IDLE line detection for short response time;
- Signed INF driver for Windows XP, 7, and 8;
- Built-in command shell for device parameters configuration;
- No external dependencies other than CMSIS;
- DFU Bootloaders Compartible (see the FIRMWARE_ORIGIN option);
(1) UART1 does not support CTS because it is occupied by USB (PA11) and cannot be remapped. RTS can still be used.
5. qemu的详细资料大全(入门必看!!!)
https://blog.csdn.net/kangkanglhb88008/article/details/126299695
https://xpack.github.io/dev-tools/qemu-arm/options/
- qemu printf问题

- 这儿讲了这个
qemu-system-gnuarmeclipse.exe命令行选项的详细使用 (是qemu官方版选项的子集,针对stm32有些特定的选项了)The GNU MCU Eclipse QEMU command line options | The xPack Build Framework